Noticed your yard in Terwillegar Towne starting to slump or planning a new build in the Highlands? Choosing the wrong retaining wall material for Edmonton’s unique clay soil is a costly mistake we see too often. This guide cuts through the noise to show you the best options, ranked for our local climate. Let’s find the right material to secure your property for decades, just like we do at EdmontonConcrete.
Why Retaining Walls Are Essential for Edmonton’s Sloped Yards and Clay Soil
Edmonton’s terrain isn’t flat, especially in river valley communities like Cloverdale or older areas with natural grade changes. Those beautiful, sloped lots come with a challenge: soil movement. A well-built retaining wall does more than just hold back dirt—it creates usable space, prevents erosion, and protects your foundation.
Think of it as an investment in your property’s structure and aesthetics. Without one, you’re fighting a losing battle against gravity and our harsh weather cycles.

Challenges of Edmonton’s Soil and Frost Heaving
Our region is famous for its expansive clay soil, which acts like a sponge. It absorbs water in the spring and fall, then expands and contracts violently during our deep freeze-thaw cycles. This phenomenon, called frost heaving, can exert immense pressure—enough to crack weak foundations and shove poorly built walls out of alignment.
It’s not just about holding soil; it’s about engineering a structure that can withstand these hydraulic forces. A wall that works in Vancouver’s mild, sandy soil will likely fail here within a few seasons. That’s why drainage is just as critical as the wall material itself.
Benefits of Retaining Walls for Property Value and Usable Space
The immediate benefit is turning a precarious, unusable slope into a flat patio, garden bed, or safe play area. This functionally adds square footage to your outdoor living space. From a value perspective, a professionally installed, durable retaining wall is a recognized hardscape improvement.
It shows prospective buyers that the property is stable and well-maintained. More importantly, it prevents the slow, costly damage that soil slippage can cause to fences, sheds, and even your home’s foundation over time.
Bottom line: a proper retaining wall solves a structural problem while boosting your home’s functionality and curb appeal.
Top Retaining Wall Materials: Types, Pros, Cons, and Costs
With so many products at the big-box stores, how do you choose? We’ve ranked the top materials based on their performance against Edmonton’s specific challenges: frost, clay, and heavy loads. The ranking considers durability, installation complexity, and long-term value.

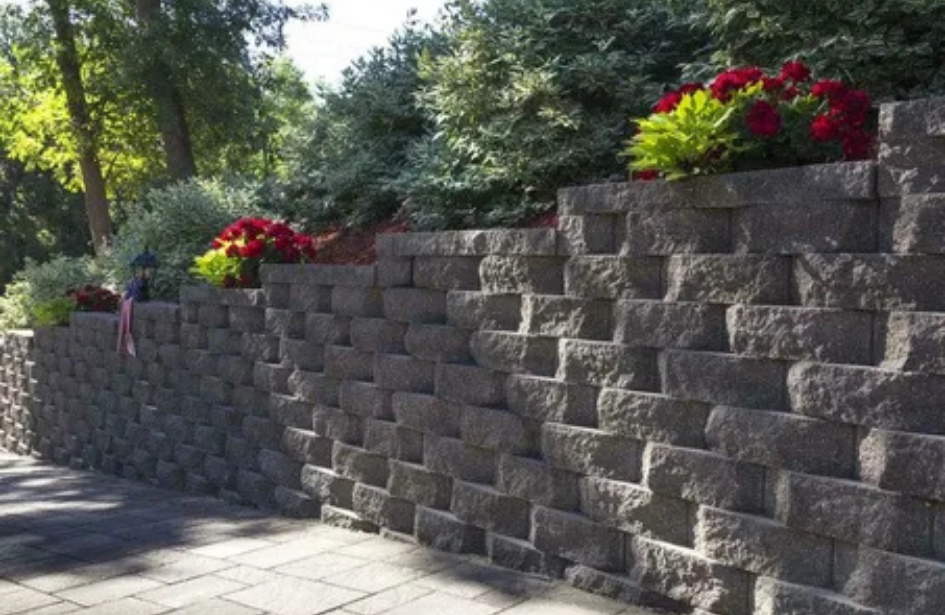
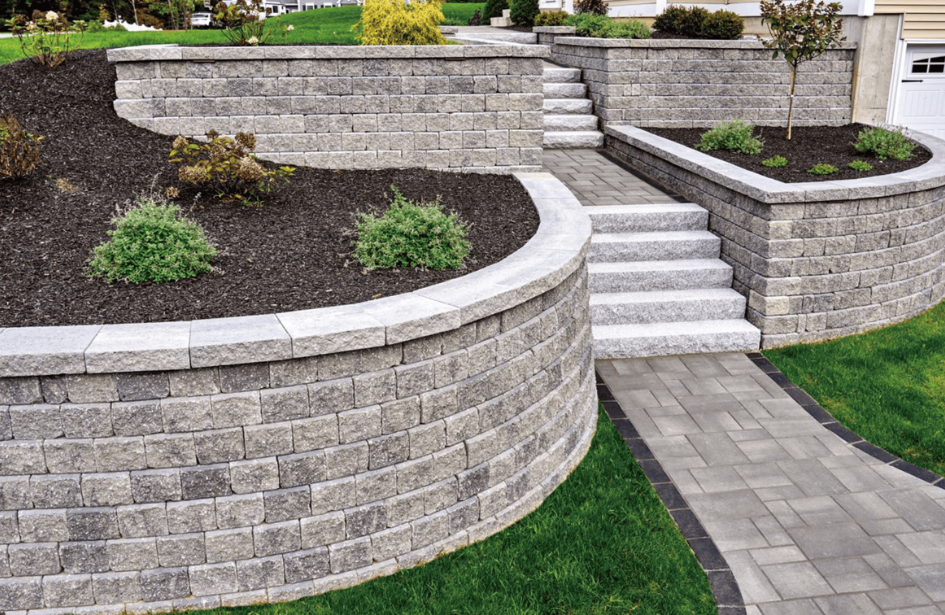
1. Concrete Blocks and Segmental Blocks
This is our top recommendation for most Edmonton homeowners, and for good reason. Segmental retaining wall (SRW) blocks are engineered concrete units with a lip or pin system that locks them together. They’re designed specifically to handle lateral earth pressure and are inherently flexible, allowing for slight movement without cracking.
The key benefit is their balance of strength, aesthetic variety, and relatively straightforward installation for pros. You can find them in a range of colours and textures, from classic stone-look to modern smooth finishes. One caveat is that their success is 100% dependent on a perfectly prepared, compacted base; a sloppy base will lead to tilting and failure.
2. Poured Concrete
For the ultimate in strength and a seamless, modern look, poured concrete is the heavyweight champion. We use reinforced concrete with rebar for walls that need to hold back significant loads, like those for a raised driveway or a multi-tiered landscape in a new Windermere development.
The key benefit is monolithic strength and design flexibility for curves or unique shapes. The major caveat is cost and complexity—it requires forming, reinforcing, and professional pouring, making it a poor candidate for DIY. It’s also less forgiving of settlement than segmented systems.
3. Natural Stone
Nothing beats the timeless, high-end beauty of natural stone like limestone or fieldstone. It’s incredibly durable and blends perfectly with natural landscapes, especially near the North Saskatchewan River Valley. When built correctly with a solid concrete footing and proper drainage, a stone wall can last a century.
The key benefit is unparalleled aesthetics and longevity. The caveat is the sky-high cost, both for materials and the highly skilled labour required for dry-stack or mortared construction. It’s also very heavy, complicating delivery and installation.
4. Timber and Wood
Pressure-treated timber (like 6x6s) offers a rustic, cost-effective look that was once very common. It’s relatively easy to work with for a DIYer tackling a small garden wall under 4 feet.
The key benefit is lower upfront material cost and a warm, natural appearance. The critical caveat is its limited lifespan in our wet climate. Even treated wood will eventually rot, especially at ground contact points. It’s generally not recommended for structural, load-bearing applications or walls over 3 feet high in Edmonton.
5. Other Options like Allan Blocks
Allan Block is a leading brand of segmental blocks, often mentioned by name. They represent the high end of the SRW category, with engineered designs for very tall walls and commercial applications. Other systems like Keystone or Versa-Lok operate on similar principles.
The key benefit is their proven, tested engineering for severe conditions. The caveat is that they are typically a contractor-supplied product and can be pricier than generic store-brand blocks. They are an excellent choice when you need certified performance data for a critical project.
| Option | Best For | Price Range (CAD) | Verdict |
|---|---|---|---|
| Concrete Segmental Blocks | Most residential projects, DIY-friendly lower walls, curved designs | $20 – $40 / sq ft installed | Best Value |
| Poured Concrete | High-load applications, modern aesthetic, tall commercial walls | $35 – $60 / sq ft installed | Premium |
| Natural Stone | High-end landscaping, heritage properties, unmatched natural beauty | $50 – $100+ / sq ft installed | Premium |
| Timber | Temporary or low, non-structural garden walls, strict budget projects | $15 – $25 / sq ft installed | Budget |
As you can see, segmental concrete blocks offer the best blend of durability, cost, and suitability for our climate. Poured concrete is the go-to for maximum strength, while timber is a budget option with a shorter life.
For 8 out of 10 Edmonton homes, segmental concrete blocks are the winning choice.
Best Materials for Edmonton’s Clay Soil and Climate
Ranking materials is one thing, but how do they actually hold up against a long Edmonton winter? The right choice resists both moisture penetration and the physical forces of frost heave. Let’s translate those general rankings into specific, local performance.
Durability Against Frost and Moisture
Concrete and stone are the clear winners here. Non-porous, dense materials don’t absorb water, which is the enemy in a freeze-thaw cycle. Segmental blocks and poured concrete, when sealed, shed water effectively. The real durability test isn’t just the face of the wall, but the entire system behind it.
That’s why the drainage aggregate and fabric are non-negotiable. They route water away from the clay soil’s pressure zone, preventing hydrostatic buildup that can push any wall over. A stone or concrete wall with poor drainage will fail just as surely as a wooden one.
Recommended Choices for Heavy Loads and Steep Slopes
Is your wall holding back a hill for a new driveway in Glenora, or just defining a flower bed? For tall walls (over 4 feet) or those supporting structures, engineered strength is paramount. Poured, reinforced concrete is the undisputed champion for these heavy-duty applications.
For most residential slopes, engineered segmental blocks rated for “heavy” or “commercial” duty are more than sufficient. These systems are designed with geogrid reinforcement layers that tie the wall back into the soil mass, creating a stable, reinforced zone. Always consult an engineer or experienced contractor like EdmontonConcrete for walls over 4 feet high.
How to Build a Retaining Wall in Edmonton: Step-by-Step Guide
Getting the theory right is half the battle. The other half is execution. A perfect material can be ruined by poor installation. Here’s a proven, step-by-step process that accounts for Edmonton’s specific needs, from planning to the final capstone.
Planning and Preparing the Site
Start by calling Alberta One-Call (811) to locate any underground utilities. Next, determine your wall’s exact location and height, which will dictate if you need a City of Edmonton permit (typically required for walls over 1.2m tall). Use stakes and string to mark the layout, accounting for the wall’s batter (the slight backward lean for stability).
Why does this matter? Skipping utility locating is dangerous and illegal. Improper layout leads to constant correction later, wasting time and materials. This upfront work is the foundation of your entire project’s success.
Excavation and Base Preparation
Excavate the area behind the wall line and dig a trench for the base. The trench depth depends on frost depth; in Edmonton, we typically go down 24-36 inches to get below the frost line for a stable base. This prevents the entire wall from being lifted by frost heave.
Adding Geotextile Fabric and Road Crush
Line the excavated trench and the area behind it with non-woven geotextile fabric. This crucial layer separates the native clay soil from your drainage gravel, preventing them from mixing and clogging. Then, fill the trench with a 6-8 inch layer of ¾-inch road crush (gravel).
Compacting the Base and Ensuring Levelness
Use a plate compactor to thoroughly compact the road crush. This is not a step to rush—a soft, uneven base is the #1 cause of wall failure. Check for level and slope along the entire length of the trench. The base must be perfectly level side-to-side and slope slightly front-to-back for drainage.
Installing the First Course of Blocks
Place your first course of blocks directly on the compacted gravel base. Do not use sand, as it can wash out. Check each block for level front-to-back and side-to-side, and ensure they are perfectly aligned with your string line. This course sets the stage for every block above it.
A mistake here multiplies as you go higher. Use a rubber mallet to tap blocks into place. Some block systems require you to cut the first course partially into the slope for added stability.
Building Additional Courses
Stack the second course, offsetting the joints from the first course (like brickwork) for strength. Many segmental blocks have a built-in lip or alignment pin system. Continue stacking, constantly checking for level and batter. For walls over 3 feet, this is where you’d install layers of geogrid reinforcement between courses, extending back into the soil.
Installing Drain Pipe and Backfilling
Once a few courses are up, it’s time for the most critical step for Edmonton: the drainage system. This is what makes your wall last.
Using Gravel Backfill and Perforated Pipes
Place a perforated drainage pipe (sock-wrapped) directly behind the bottom course of blocks. Ensure it slopes gently (about 1% grade) to daylight at one or both ends of the wall. Then, backfill behind the wall with clear, washed ¾-inch gravel, not leftover dirt.
Adding Weep Holes and Drainage Sleeves
The gravel backfill should cover the pipe and extend up behind the wall. In some designs, you install drainage sleeves (plastic tubes) through the blocks at the bottom course to act as weep holes, allowing water to escape directly through the wall face.
Finishing the Wall
Complete stacking the wall to its final height. Install adhesive and a final layer of capstones to cover the block cores and give a finished look. This also protects the wall from water pooling on top.
Adding Capstones, Plants, and Landscaping
Secure capstones with construction adhesive designed for masonry. Finally, you can backfill the top 6-12 inches behind the wall with topsoil for planting. Avoid deep-rooted plants directly against the wall, but shallow-rooted ground cover can help with erosion and aesthetics.
Remember: the gravel drainage zone must remain clear and functional behind the wall for its entire life.
Drainage and Soil Considerations for Long-Lasting Walls
We’ve mentioned drainage repeatedly because it’s that important. In Edmonton, a retaining wall is a drainage structure that also holds back soil. Getting the materials and layers right behind the wall is what separates a 30-year solution from a 3-year problem.

Importance of Proper Drainage to Prevent Failure
Waterlogged clay soil behind a wall becomes heavy and exerts tremendous pressure (hydrostatic pressure). When that water freezes, it expands and pushes even harder. Proper drainage relieves this pressure by giving water an easy escape route through the gravel and out the drainage pipe.
Without it, the wall is acting as a dam. Eventually, the pressure wins, causing the wall to bulge, crack, or completely topple over. This is the most common failure mode we see in DIY projects.
Base Material Choices: Dense vs. Open Graded
For the wall base and the drainage zone behind it, you need different types of gravel. The base (under the blocks) requires “dense graded” aggregate like road crush—it compacts into a solid, stable foundation. The drainage zone behind the wall needs “open graded” or clear drain rock—it has voids between stones that allow water to flow through freely.
Using the wrong type, like putting dusty pit-run gravel behind the wall, will clog and defeat the purpose. Always specify washed drainage gravel for the backfill.
Backfill Materials and Compaction Techniques
Backfill in layers (lifts) of about 6 inches of gravel at a time, compacting each layer lightly. You want to stabilize the soil, but not over-compact the drainage stone and reduce its porosity. The geotextile fabric should be folded over the top of the gravel layer before adding topsoil to prevent soil from washing down and clogging the system.
Costs, Lifespan, and Installation Tips
Let’s talk numbers and longevity. What’s the real investment, and how long can you expect your wall to stand strong? Understanding these factors helps you budget wisely and choose between DIY and professional help.
Material Cost Comparison
Costs vary widely based on material, wall height, length, and site access. As a rough guide, material-only costs for a segmental block wall start around $10-$15 per square foot of wall face. For poured concrete, materials (concrete, rebar, forms) might be $15-$25 per sq ft. Remember, these are just material costs and don’t include gravel, fabric, pipe, or delivery.
Professional installation typically doubles or triples the material cost, as it includes excavation, base prep, all materials, labour, and expertise. The table earlier gives you installed price ranges.
Typical Lifespan by Material
- Poured Concrete & Natural Stone: 50+ years with proper footing and drainage.
- Segmental Concrete Blocks: 30-50 years, depending on block quality and installation.
- Pressure-Treated Timber: 10-20 years, with deterioration starting at ground contact points sooner.
These lifespans assume professional-grade installation with perfect drainage. A poorly drained wall of any material will have a drastically shorter life.
DIY vs. Professional Installation
A short, straight, garden wall under 3 feet can be a manageable DIY project if you are meticulous with base prep and drainage. The moment your wall is over 4 feet, on a slope, or holding back a structure, professional installation is a must.
Pros bring laser levels, plate compactors, and the experience to foresee and solve problems with soil stability and water flow. They also handle the heavy lifting and ensure the work meets local building codes, which is critical for your safety and liability.
Permits and Regulations for Edmonton
The City of Edmonton requires a development permit for any retaining wall over 1.2 metres (about 4 feet) in height. There may also be regulations regarding distance from property lines. Always check with the City’s planning department before you start digging.
A reputable contractor will handle this permit process for you. Skipping permits can lead to fines and force you to remove a non-compliant wall.
Common Mistakes and How to Avoid Them
After years at EdmontonConcrete, we’ve seen the same errors lead to costly call-backs. Here’s how to spot and avoid them from the start, saving you time, money, and frustration.
1. Inadequate Base Preparation: Skipping the deep trench, skimping on gravel, or poor compaction. This leads to settling and tilting. The Fix: Excavate to frost depth, use the right gravel, and compact in layers until it’s rock-solid.
2. Poor or Missing Drainage: Backfilling with dirt instead of gravel, omitting the fabric, or forgetting the drain pipe. This guarantees hydrostatic failure. The Fix: Treat the drainage system as the most important part of the wall. Never compromise on gravel, fabric, and pipe.
3. Ignoring Frost Heave: Building a wall on a shallow base that sits in the frost zone. The frozen ground will lift it unevenly. The Fix: Base your wall footing below the local frost depth (at least 24-36 inches in Edmonton).
4. Choosing the Wrong Material for the Job: Using timber for a tall, structural wall or flimsy blocks for a heavy load. The Fix: Match the material’s engineered strength to the soil height and load it must hold. When in doubt, consult a pro.
Sound overwhelming? It doesn’t have to be.
Now that you know the best materials and the critical steps, you’re equipped to make an informed decision. For most projects in neighbourhoods like Riverbend or Oliver, segmental concrete blocks installed with military-grade attention to the base and drainage are the smart, lasting choice.
Ready to transform that unstable slope into beautiful, usable space? The team at EdmontonConcrete has the local expertise to navigate Edmonton’s soil and build a retaining wall that stands the test of time. Get in touch for a consultation and a quote tailored to your specific yard.